How to Make Terrains in Tiled Map Editor
Hey there, humans! Know what’s really cool about using the Tiled Map editor? You don’t have to place every single terrain tile by hand like a goon (like I was doing). Instead you can follow these handy steps to building large terrains within a matter of minutes instead of countless hours. This should save you one or two head slams to the wall.
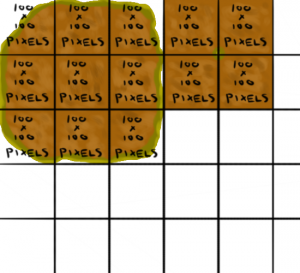
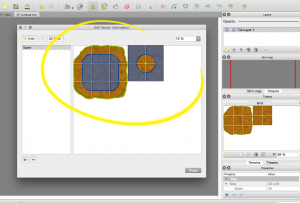
1. Draw your terrain tile map. For your tile map you are going to draw nine land tiles and four corner tiles. There are several ways you can arrange these but I like to use the format shown in the picture below. The land tiles are the nine to the left and the corner tiles are the four to the right. Each tile should be EXACTLY the same amount of pixels high as they are wide, otherwise it might appear to look off. For this demonstration I have made all of my tiles 100 pixels high by 100 pixels wide.
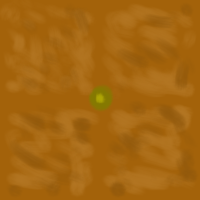
The hardest part of drawing a terrain is probably figuring how to draw the corners. Here is what my corner pieces look like:
Note how the grass is in the center of the corners. This represents the top, bottom, left and right corner edges that you will need to complete your terrain map. The easiest way to draw this is to sample the surface colors of your land tiles and put them right in the center of your four corner tiles.
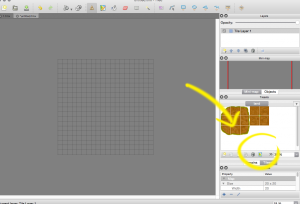
2. Drag your map into Tiled and select the terrain button. You can find this button on the bottom right:
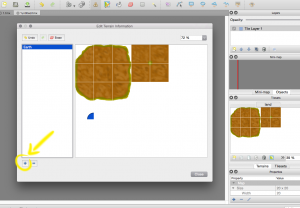
3. Click the plus button to create a new terrain. Name it something you’ll remember
4. Outline your terrain. Use the blue outlining tool that will automatically appear when you mouse over your map. Click and mark it like so:
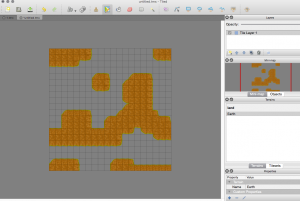
5. Select the terrain tab and your terrain. Once you have it selected go ahead and draw your terrain on the grid! Try making some interesting shapes and layers to make it have some depth. Here is what mine ended up looking like:
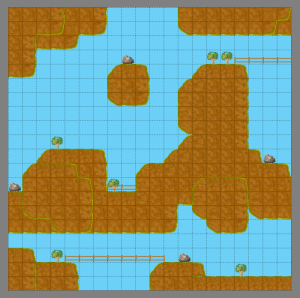
6. Add some eye candy. Adding objects makes the map look much more interesting:
Okay! Now we are on our way to making something interesting. I didn’t put as much time as I would have liked into the drawing of these assets, but hopefully this inspires you enough to go out and draw something awesome. Check back in the next upcoming weeks as we go over how to implement maps into games, among other interesting topics. If you have any questions or topic suggestions leave us a message in the comments below!

