Recently we have recoded Vikings and have decided to implement maps we built in Tiled. This has been advantageous for many reasons including being able to build larger maps with less art assets. It has also allowed us to establish collision zones by setting a specific layer to be the collision layer. Let me explain this in a a more visual fashion!
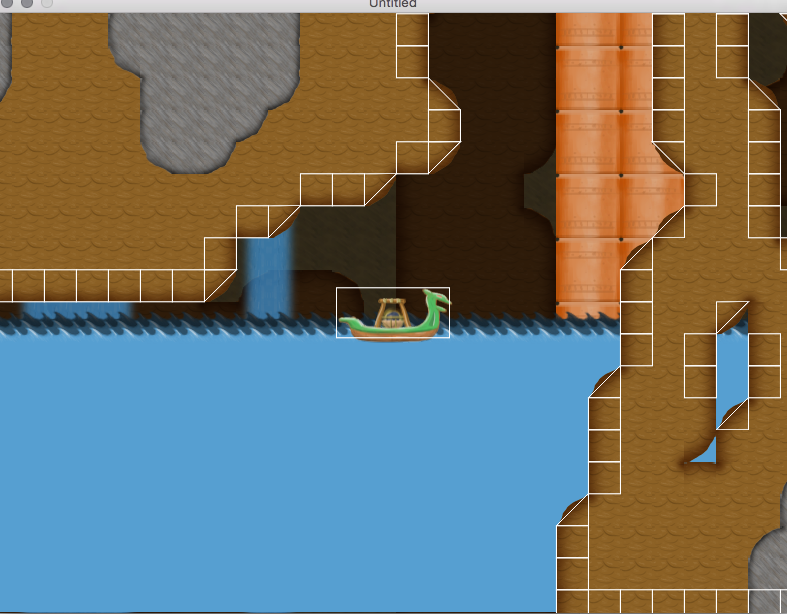
Here is a screenshot from the newest version of Vikings (which is still very much under construction). If you look at the picture you can see we’ve outlined our collide-able objects for testing. You can also see that we’ve outlined the cave walls with squares and triangles that define where the collision zones are. I was able to define these collision zones in Tiled by setting properties:
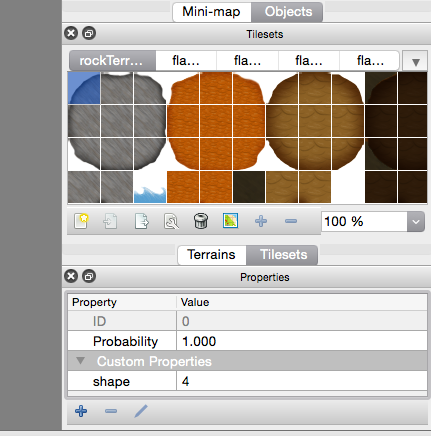
As you can see I had my terrain tiles laid out and I gave each piece of each nine tile a property by clicking on the plus at the bottom of the program. I labeled each property “shape” and gave it a number. The number represents what kind of shape it is:

I labeled each square piece of the nine tile with a 1. That way when you code the game you can say that each tile that is labeled 1 will show up as a collide-able object. I’ve labeled my triangle corner piece 4,5,2 and 3 because they each have unique characteristics but will behave just like the squares.
Using this approach can open up a variety of possibilities for 2D game developers. You can make any shape you would like and at any size! If you code things right you could even have mineable levels or ones that explode, fall apart, or reshape.
Hopefully this short tutorial has been of some help to you, and if you have any questions, praise or jibes please leave them in the comments below!